
Why Long Hours of Sitting Hurt Your Pelvis and Lower Back
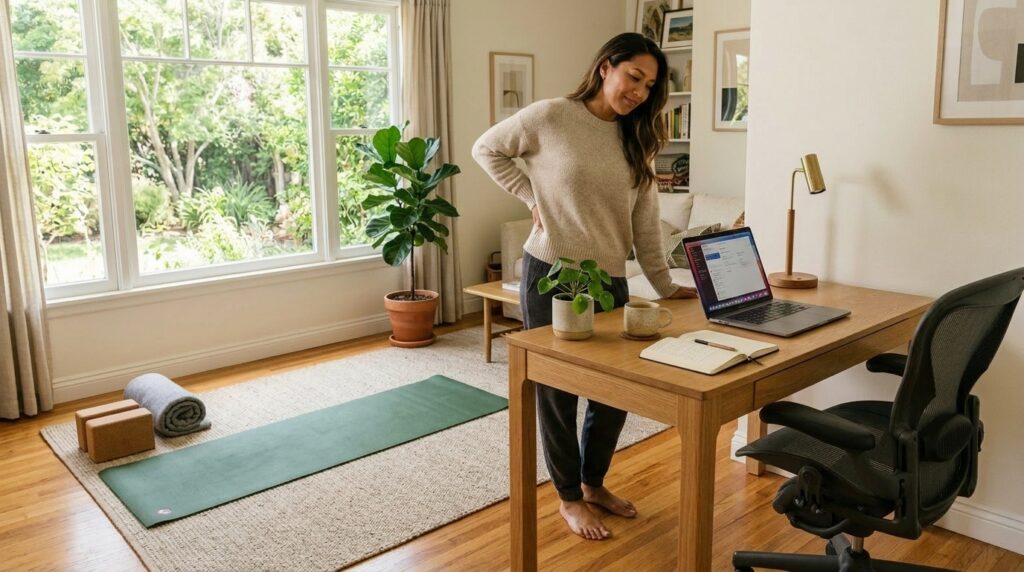
If you sit at a desk for most of the day, you may notice a familiar pattern:
Your lower back feels tight, your hips feel uneven, and standing up after work feels harder than it should.
It is easy to blame “not exercising enough,” but in many cases the real issue is how long you stay in the same sitting position.
When you sit for eight hours or more most days, the muscles around your pelvis and lower back gradually stiffen, weaken, and fall out of balance.
Over time that can change how your pelvis is aligned, how your spine stacks on top of it, and how your whole body moves.
The good news: you do not need a full gym workout to start undoing some of that stiffness.
In this guide, you will learn what happens to your pelvis when you sit all day and how to use a simple 15-minute home routine to gently reset your hips and lower back.
I tested a version of this routine on evenings when my back felt tight after writing for hours, and even one 15-minute block made the rest of the night feel noticeably lighter.
This routine is for mild stiffness and fatigue from everyday sitting, not for treating serious pain or disease.
If your symptoms are severe, new, or persistent, talk to a healthcare professional before continuing.
What Prolonged Sitting Does to Your Pelvis
When you sit, your pelvis acts like the base of a tower: it supports your spine, torso, and head.
Ideally it stays relatively neutral, with your weight evenly distributed on both sitting bones.
But many desk workers lean into the backrest, cross their legs, or load more weight onto one hip without noticing.
Over months and years, that kind of posture can change how your muscles work around the pelvis.
- Hip flexors and front thigh muscles tend to get shorter and tighter.
- Glutes and deep hip stabilizers can become underused and weaker.
- Lower back muscles may stay slightly “on” for hours, building chronic tension.
One review on sedentary lifestyle and spine health notes that prolonged sitting often tightens hip flexors and hamstrings, alters pelvic alignment, and increases mechanical stress on the lumbar spine.
This combination is a common recipe for lower back discomfort and feeling “crooked” when you stand up.
You might notice signs such as:
- Your lower back and hips always feel heavy or stiff after sitting.
- One side of your buttock or hamstring feels tighter or more tired.
- Your trousers seem to pull more on one side.
- Your shoulders or hips look slightly uneven in the mirror or in photos.
These signals do not automatically mean you have a serious condition.
However, ignoring them for years can increase the risk of chronic low back pain and posture-related problems.
Why Short, Regular Breaks Matter More Than “Perfect Posture”
Health services and spine specialists increasingly emphasize movement, not just sitting “perfectly,” as a key part of back care.
UCLA Health and other spine programs stress that no matter how good your chair is, staying in a static posture for too long is not good for your back.
They recommend standing up, stretching, and walking for a minute or two at least every 30 minutes.
Similarly, hospitals like HSS highlight frequent movement breaks as one of the most helpful habits for reducing back pain from sitting.
The takeaway is simple:
- Long, uninterrupted sitting increases strain on your pelvis and spine.
- Short, regular bouts of movement and gentle stretching help unload those areas and restore circulation.
You do not have to become a fitness person overnight.
A small, consistent “15-minute reset” done once a day can slow down the rate at which your posture and comfort decline.
Overview of the 15-Minute Pelvis & Lower Back Reset Routine
This home routine takes about 15 minutes and is designed for desk workers and people who sit most of the day.
You can do it on a yoga mat, carpet, or a folded blanket.
Here is the structure:
- 7 minutes – Pelvis and lower back release
- 5 minutes – Gentle spinal alignment stretches
- 3 minutes – Full-body relaxation
You will go through five simple movements:
- Knees-to-chest hold
- Bridge pose
- Supine spinal twist (side-to-side)
- Cat–cow on hands and knees
- Child’s pose to finish
Move slowly, breathe steadily, and stay in a range that feels like gentle stretching, not sharp pain.
If any movement makes your symptoms worse, stop and skip that step.
If you want extra help with your overall desk posture, you can also read our guide on 15-Minute Home Office Posture Reset: Gentle Stretches to Ease Back and Neck Tension.
Step 1 – Knees-to-Chest Hold (Pelvis & Lower Back Release)
Lie on your back with your legs extended and relax your shoulders.
Slowly bend both knees and draw them toward your chest.
Wrap your hands around your shins or behind your thighs, whichever is more comfortable.
Gently hug your knees in until you feel a mild stretch in your lower back and hips.
- Hold for about 20 seconds.
- Rest briefly, then repeat one more time.
Breathe in through your nose, and as you exhale through your mouth, imagine your lower back and pelvis melting toward the floor.
Let your tailbone and the back of your ribcage sink into the mat.
Safety tips
If your lower back hurts when you pull your knees in, do not force it.
Gently hold your legs in a more relaxed position, and focus on calm breathing instead of intensity.
Step 2 – Bridge Pose (Wake Up the Muscles Around Your Pelvis)
Stay on your back and bend your knees with your feet flat on the floor.
Place your feet about hip-width apart and close enough that you can touch your heels with your fingertips.
Rest your arms by your sides with your palms down.
As you inhale, slowly lift your hips off the floor.
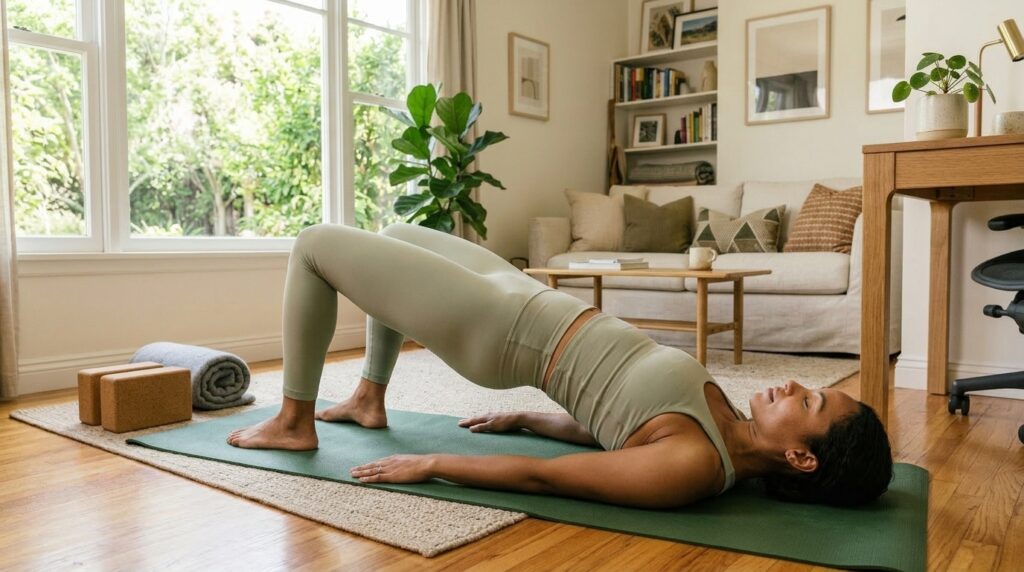
Aim to bring your knees, hips, and shoulders roughly into a diagonal line.
Hold this position for about 5 seconds, then exhale and slowly lower your spine back down, one vertebra at a time.
Repeat 10 times at a comfortable pace.
Breathing
Inhale as you lift.
Keep breathing lightly while holding, and exhale slowly as you roll back down.
Safety tips
Avoid pushing from your lower back alone.
Think about pressing through your heels, squeezing your glutes, and using the back of your thighs to support the lift.
If you feel any sharp or “electric” pain in your lower back, reduce the height of the lift or skip this exercise.
Step 3 – Supine Side-to-Side Spinal Twist (Gentle Alignment)
Lie on your back again and stretch your arms out to the sides at shoulder height, forming a “T” shape.
Bend your knees and place your feet flat on the floor, keeping your legs together.
Take a deep breath in.
As you exhale, slowly let both knees drop toward the right side, only as far as feels comfortable.
Turn your head gently to the left for a deeper stretch through your spine and side body.
Hold for about 20 seconds, breathing steadily.
Bring your knees back to the center, then repeat on the other side.
Do 1–2 rounds on each side.
Breathing
Inhale through your nose, feeling your belly and ribs expand.
Exhale slowly through your mouth and imagine your back and hips sinking heavier into the floor.
Safety tips
You are looking for a “comfortable stretch,” not pain.
If your hips or back feel strained, keep your knees farther from the floor or place a pillow under your legs for support.
Step 4 – Cat–Cow (Mobilize the Entire Spine)
Come onto all fours with your hands under your shoulders and your knees under your hips.
Keep your spine in a neutral, flat position to start.
As you inhale, gently drop your belly toward the floor, lift your chest, and let your tailbone tip up.
This is your “cow” position, opening the front of your body.
As you exhale, engage your core, round your spine toward the ceiling, and tuck your tailbone under.
Let your head relax and gaze toward your belly. This is your “cat” position.
Move slowly back and forth between these two positions 10–12 times.
Breathing
Inhale as you open your chest and arch gently into cow.
Exhale as you round into cat, focusing on lengthening the back of your spine.
Safety tips
Avoid forcing your neck.
Keep your gaze soft and roughly toward the floor or your belly, rather than looking far up or back.
Step 5 – Child’s Pose (Rest Your Pelvis and Lower Back)
From all fours, bring your knees a bit wider than hip-width apart and sit your hips back toward your heels.
Rest the tops of your feet on the floor.
Lower your torso toward the ground and place your forehead on the mat, on your hands, or on a cushion.
You can stretch your arms forward or let them relax by your sides.
Stay here for 1–1.5 minutes if it feels comfortable.
Breathe slowly and let your lower back and hips soften with each exhale.
As you breathe out, you might imagine the tension of the day slowly leaving your pelvis and spine.
Safety tips
Your hips do not have to touch your heels.
If your lower back feels uncomfortable, widen your knees or place a cushion under your torso for support.
Daily Habits That Protect Your Pelvis When You Sit All Day
Short routines like this are powerful, but they work even better with small posture and movement habits during the day.
- Set a timer to stand up every 30–60 minutes.
Walk for a minute, roll your shoulders, or do a quick hip flexor stretch. - When you sit, plant both feet on the floor and keep your pelvis slightly upright instead of collapsing into the backrest.
Ergonomics guides from major health systems recommend sitting back into the chair, using lumbar support, and keeping your screen at eye level to reduce strain. - Instead of forcing a rigid “military straight” posture, focus on stacking your ribs over a neutral pelvis.
A small, sustainable adjustment you can hold all day is better than a dramatic pose you can maintain for only 30 seconds.
Remember: this routine is for everyday stiffness and fatigue.
If your pain is sharp, getting worse, or accompanied by leg weakness, numbness, or noticeable pelvic asymmetry, stop the exercises and seek medical advice.
Related Routines You Might Like
- 15-Minute Home Office Posture Reset: Gentle Stretches to Ease Back and Neck Tension – A routine focused on your upper back and neck after long hours at your desk.
- 15-Minute Pelvis and Lower Back Reset Routine at Home: Gentle Stretches for Everyday Stiffness – A complementary session that reinforces pelvic alignment and lower-back mobility.
- 15-Minute Stretch Routine to Ease Lower Back and Pelvis Tension After Standing All Day – Ideal if you alternate between long sitting days and long standing days.
You can link to these posts directly from your WordPress blog once you decide which URLs to use.
Frequently Asked Questions
Q1. How often should I do this 15-minute pelvic reset routine?
Ideally, do it once a day on workdays when you sit for long periods.
If that feels like too much, start with two to three times per week and build up as it becomes more natural.
Q2. What if I cannot do all five exercises?
That is completely fine.
Start with one or two movements that feel safe—such as the knees-to-chest hold and child’s pose—and keep the whole routine under 10 minutes. The goal is consistency, not perfection.
Q3. Can I do this routine at the office or only at home?
You can do most of it at home on a mat, but some elements adapt well to the office.
For example, cat–cow can be modified as a seated spine roll, and you can practice short standing breaks and gentle twists beside your desk.
Q4. When should I stop and see a doctor instead?
Stop the routine and consult a healthcare professional if you notice increasing pain, pain that wakes you at night, numbness or tingling in your legs, weakness, or visible changes in your posture that worry you.
Also seek medical advice if your symptoms do not improve after several weeks of self-care.
Learn More
For more on how prolonged sitting affects your spine and how to protect your back and pelvis, see:
- UCLA Health – Ergonomic and Proper Posture for Sitting
Practical guidelines on chair setup, desk height, and why you should stand, stretch, and walk regularly during the day.
https://www.uclahealth.org/medical-services/spine/patient-resources/ergonomics-prolonged-sitting - Hospital for Special Surgery (HSS) – If You Have Back Pain When Sitting, Here’s How to Fix It
Explains why frequent breaks and posture adjustments are key to easing back pain from sitting, plus simple exercises to improve sitting posture.
https://www.hss.edu/health-library/move-better/back-pain-when-sitting - Mayo Clinic Health System – Back Pain Basics and Self-Care Tips
Overview of common causes of back pain and evidence-based self-care strategies, including movement, stretching, and when to see a doctor.
https://www.mayoclinichealthsystem.org/hometown-health/speaking-of-health/back-pain-self-care-tips - WHO – Guidelines on Chronic Low Back Pain
Global recommendations highlighting education, exercise, and self-care strategies as core components of non-surgical back pain management.
https://www.who.int/news/item/07-12-2023-who-releases-guidelines-on-chronic-low-back-pain
Leave a Reply