
When “Good Pain” from the Foam Roller Goes Too Far
If you sit most of the day for work or study, your lower back, hips, and thighs can feel like concrete by the evening. A few minutes on a foam roller can make your body feel lighter and more relaxed, so it is tempting to think “If some pressure feels good, more must be better.”
The problem is that pressing too hard, rolling for too long, or rolling directly over the wrong areas—like your lower back or knees—can actually increase pain or even cause bruising and irritation. This beginner‑friendly guide shows you a gentle 15-minute foam rolling routine and the key safety rules to protect your spine and joints instead of hurting them.
I tested this softer routine on days when my back and hips felt tight from sitting, and focusing on the right areas for short periods made my body feel looser without the “I overdid it” soreness the next day.
Important Safety Note Before You Start
This routine is for mild stiffness and fatigue, not for treating serious pain or disease. If your symptoms are severe, new, or persistent—such as sharp pain, strong numbness, or unexplained weakness—stop and consult a doctor or physical therapist before continuing.
Foam rollers can gently relax muscles and fascia, but they are not medical devices and should never replace professional diagnosis or treatment, especially if you have conditions such as herniated discs, severe osteoporosis, or acute joint injuries.
Why Foam Roller Technique Matters So Much
Foam rolling is a form of self‑myofascial release: you use your body weight on a roller to gently compress muscles and fascia. When used correctly—on larger muscle groups like the upper back, glutes, and thighs, with moderate pressure and slow movement—research and expert guidelines suggest it can improve flexibility and help muscles feel less tight.
However, rolling directly on joints or bony areas can irritate tendons and ligaments, and rolling the lower back or neck can put unsafe pressure on the spine, especially in beginners. People with osteoporosis or acute disc problems are often advised to avoid strong foam rolling over the spine or painful areas unless a healthcare professional guides them.
The goal of this routine is simple: keep the roller on thick muscles only, use gentle pressure, and stay away from your spine and joints.
Overview: A 15-Minute “Safe First” Foam Roller Routine
This routine is designed as a gentle, safer starting point for beginners:
- 5 minutes: upper back and side body (avoid your lower back and neck)
- 5 minutes: glutes and thighs (muscle areas only, not joints)
- 5 minutes: light stretching and breathing to calm your body
Core safety rules:
- Use the foam roller only on muscle‑rich areas like upper back, lats, glutes, and thighs
- Roll each area for about 30–60 seconds, up to 2 minutes max
- Do not roll directly on your neck, lower back, or joints like knees, elbows, or ankles
If you want a full 15-minute routine that combines foam rolling with heat and relaxation, you might also like our 15-Minute Foam Roller Routine: Full-Body Release with Heat Packs and Herbal Tea.
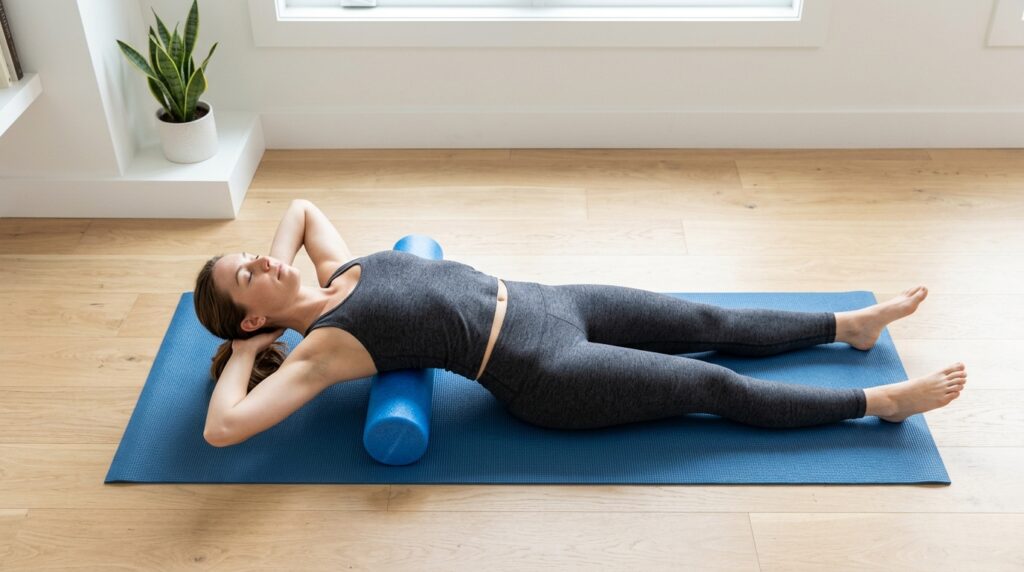
Step 1 – Upper Back and Side Body (5 Minutes)
1. Upper and Mid Back (Avoiding the Lower Back)
- Sit on a mat with your knees bent and place the foam roller horizontally behind you.
- Cross your arms over your chest and gently lean back so the roller is under your upper back, just below your shoulder blades.
- Lift your hips slightly and use your legs to slowly roll up and down along the upper and mid back.
Spend about 30–60 seconds, rest, and repeat up to two sets. Keep the roller in the upper two‑thirds of your back (thoracic spine) and avoid arching so far that you feel pressure directly in your lower back. If you feel your lumbar spine being “crushed” or pinched, move the roller higher and reduce your range.
2. Side Body and Lat Area
- Lie on your side and place the roller under your armpit area, along the side of your ribcage.
- Extend the lower arm; use the top hand on the floor to support your body.
- Slowly roll from just below the armpit toward the middle of your side, then back.
Spend 30–60 seconds per side. If you feel the ribs themselves pressing uncomfortably into the roller, rotate slightly until you feel more pressure on the muscles instead of the bones.
If you want more ideas for gentle upper‑body release without a roller, see our 15-Minute Neck and Shoulder Stretch Routine for Desk Workers.
Step 2 – Glutes and Thighs (5 Minutes)
1. Glute (Hip) Rolling
- Sit on the roller as if it were a low bench.
- To target the right glute, cross your right ankle over your left knee (a “4” shape) and lean slightly toward the right side.
- Use your hands and left foot for support and slowly roll forward and back over the right glute muscles.
Spend about 30–60 seconds per side. The gluteal muscles are thick and can tolerate more pressure, but beginners should stay in the range of “strong but breathable” pressure, not sharp pain.
2. Front and Side Thighs (Avoiding Knees and Hips)
- Lie face down with the roller under the front of your thighs and support your upper body on your forearms.
- Roll from just above your knees to just below your hip bones for 30–60 seconds, then shift slightly to one side to work the outer thigh (IT band area) for another 30–60 seconds per side.
Avoid pressing directly on your kneecaps or hip joints; focus on the muscular areas instead. Foam rolling guidelines strongly advise avoiding direct rolling over joints and bony prominences, because this can irritate tendons, ligaments, and the joint surfaces.
If you prefer a pure stretching version on days you do not want to use the roller, you can follow our 15-Minute Full-Body Stretch Routine for Long Study Sessions.
Step 3 – Gentle Stretching and Breathing (5 Minutes)
After foam rolling, spend 5 minutes calming your body and letting your muscles settle.
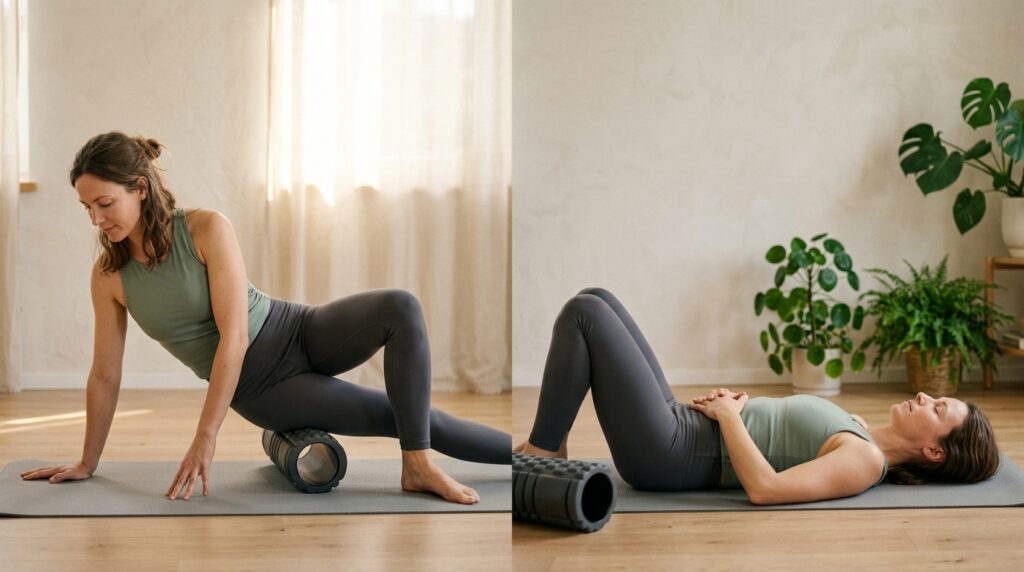
1. Easy Breathing on the Floor
- Lie comfortably on your back with your knees bent and feet on the floor.
- Place your arms out to the sides or rest your hands on your belly.
- Inhale slowly through your nose, then exhale gently through your mouth for 1–2 minutes.
This helps your nervous system shift out of “work mode” and reduces the chance of standing up too quickly with lightheadedness after rolling.
2. Light Static Stretching
- Gently stretch the backs of your thighs with a simple hamstring stretch.
- Move your neck and shoulders in small circles or half‑circles, staying in a comfortable range.
Many musculoskeletal health resources emphasize that gentle, regular stretching and good everyday habits are important for preventing and managing muscle and joint discomfort over time. Think of your foam roller as a tool that makes stretching more comfortable, not as the main treatment by itself.
Everyday Safety Tips for Foam Roller Use
1. Keep Sessions Short and Gradually Increase
For most beginners, it is safest to:
- Limit each muscle area to 30–60 seconds, up to 2 minutes
- Keep the total foam rolling time around 15–20 minutes per session
Some expert guidelines recommend increasing intensity and duration gradually to avoid soreness or bruising, and to avoid rolling the same tender area hard on consecutive days.
2. Be Extra Careful If You Have Certain Conditions
If you have any of the following, check with a healthcare professional before using a foam roller:
- Herniated discs or serious back problems
- Severe osteoporosis or osteopenia
- Acute injuries, sprains, or inflamed joints
- Autoimmune flare‑ups or conditions that affect connective tissue
Foam rolling can put significant pressure on bones and joints, which may increase the risk of fracture or worsen symptoms in people with fragile tissues. When in doubt, get a personalized plan from a doctor or physical therapist.
3. Stop Immediately If Your Body Sends Warning Signals
During or after foam rolling, stop and seek medical advice if you notice:
- Sharp, stabbing, or burning pain
- Strong numbness or tingling
- Dizziness, nausea, or feeling faint
- Unusual swelling or large bruises
Mild discomfort or a “good pressure” sensation can be normal, but persistent or intense pain is a sign to stop, not to push through.
Related Routines You Might Like
- 15-Minute Foam Roller Routine: Full-Body Release with Heat Packs and Herbal Tea – A gentle full‑body foam roller routine paired with heat packs and herbal tea to help your body unwind.
- 15-Minute Full-Body Recovery Stretch After Air Conditioning Fatigue – For days when cold air has left your muscles feeling tight and heavy.
- 15-Minute Recovery Stretch Routine for Your Back and Knees After Housework – A light routine to ease stiffness after standing, bending, and lifting around the house.
Frequently Asked Questions
Q1. Is foam rolling safe if I already have back or joint pain?
If you have diagnosed conditions such as herniated discs, severe arthritis, scoliosis, or recent injuries, talk with a doctor or physical therapist before using a foam roller. In many cases, you should avoid rolling directly over painful areas, especially the lower back and neck, and instead use gentler exercises prescribed by a professional.
Q2. How hard should I press when I use a foam roller?
You should feel firm but tolerable pressure, not sharp or burning pain. Many experts suggest using an intensity that feels like “good pressure you can breathe through,” and stopping if you automatically hold your breath, tense up, or feel like you need to endure pain. Foam rolling is not meant to be a pain‑tolerance challenge.
Q3. Can I roll my neck or lower back with a foam roller?
Most safety guidelines recommend avoiding direct rolling on the neck and lower back, especially for beginners. These areas lack the same bony support as the upper back and can be stressed by hyperextension. Instead, focus foam rolling on the upper back and surrounding muscles, and use gentle stretches or professional guidance for your neck and lower back.
Q4. How often can I do this 15-minute foam roller routine?
If your body tolerates it well, you can start with 2–3 times per week and see how you feel. Avoid rolling hard on the same sore spot every day; give your tissues time to recover. If you feel more pain, bruising, or lasting soreness, reduce frequency and pressure, or pause and consult a professional.
Learn More
For more on foam roller safety and self‑myofascial release, see:
- HFE – The Dos and Don’ts of Foam Rolling
Practical list of foam rolling guidelines, including avoiding joints, the neck, and the lower back, and using slow, controlled movements.
https://www.hfe.co.uk/personal-trainer/articles/the-dos-and-donts-of-foam-rolling/ - Gaiam – 9 Foam Roller Dos and Don’ts
Explains why you should not roll directly on joints or the lower back and how to keep sessions short and safe.
https://www.gaiam.com/blogs/discover/9-foam-roller-dos-and-don-ts - BLACKROLL – When Should Fascia Training Be Avoided?
Highlights situations where foam rolling and fascia training require extra caution, such as osteoporosis and acute disc issues.
https://blackroll.com/article/when-should-fascia-training-be-avoided - IDEA – Self‑Myofascial Release Without the “Ouch!”
Provides detailed guidance on adjusting pressure, choosing softer rollers for vulnerable clients, and recognizing when techniques are too intense.
https://www.ideafit.com/self-myofascial-release-without-the-ldquoouchrdquo/
Leave a Reply